

This page is still being developed, thank you for understanding
Overview
- Army console commands
- Reroll mercenaries-for-hire
- Teleport combat squads
- Lord console commands
- Lay claim and finalize claim on region
- Add influence and treasury
- Region console commands
- Add resources to buildings
- Demolish buildings
- Insta build
- Skip mourning
- Spawn construction resources
- Add, spawn, remove, and mark rich Deposits (iron, clay, salt)
- Increase limit and restore farming fertility
- Grow planted trees
- Place and remove fishing ponds
- Skip livestock order cooldown
- Spawn animals
- Grow population
- Add, spawn, remove, and mark rich regional Resources (berries, mushroom, fish, stone)
- Add regional wealth and approval
- Spawn bandit camps and raiders
- Mics console commands
- Change game speed
- Skip day
- Rename any unit
- Follow any unit
- Trigger and skip weathers (drought, rain)
- Built-in console commands
- Common Unreal Engine commands
- Spawn resources to player region
Wild Animals commands has been moved to the Wild Animals Mod
Available Commands
Print the print-commands of this mod to the console window.
The commands are grouped into Lord, Army, Region, and Misc.
How to use:
- Enter the command
- The commands will be printed to the Console Window, make sure the console is extended to see them
Print the print-commands of this mod to the console window.
invokes k.printCommands
Army commands
Print Army related console commands to the console window.
How to use:
- Enter the command
- The commands will be printed to the Console Window, make sure the console is extended to see them
Army - mercenary
Reroll the list of mercenaries available for hire.
Reroll (refresh) the available mercenaries in the Hire Mercenaries screen.
How to use:
- Enter the command
- You might need to reopen the screen to see changes
Army - squad
Teleport all selected squads to location under player cursor
No collision check, select location wisely.
You can teleport multiple squad at once, but colliding position will make them stuck.
The squads will retain their rally position, reform them to new position otherwise they will walk back
If unit can barely move try save game and load.
How to use:
- Select the squads you want to teleport, use the Army tab or Area select
- Pick a location and hover your mouse cursor over it
- Enter the command
- Squads will be teleported when the game is resumed (not paused)
Lord Commands
Print Lord related console command to the console window
How to use:
- Enter the command
- The commands will be printed to the Console Window, make sure the console is extended to see them
Lord - diplomacy
Finalize all region claim initiated by the player
How to use:
- Enter the command
Finalize region claim on current region if initiated by the player
How to use:
- Move view to the claimed Region
- Enter the command
Lay Region Claim on current region
current region refer to the Region under player view
Example usage:
- Move view to the unclaimed Region
- Enter the command
Lord - stat
Add Player Influence by
amount
Put negative amount to decrease
How to use:
- Enter the command
Example usage: k.addInfluence 999 k.addInfluence -999
Add Player Treasury by
amount
Put negative amount to decrease
How to use:
- Enter the command
Example usage:
k.addTreasury 999
k.addTreasury -999
Set Player Influence to
amount
How to use:
- Enter the command
Example usage:
k.setInfluence 999
k.setInfluence -999
Set Player Treasury to
amount
How to use:
- Enter the command
Example usage:
k.setTreasury 999
k.setTreasury -999
Region Commands
Print Region related console commands to the console window
How to use:
- Enter the command
- The commands will be printed to the Console Window, make sure the console is extended to see them
Region - building
Add Item by
itemId by
amount to selected buildings
Put negative amount to decrease
Selected buildings is the building you select (building panel open), pin multiple panel to select multiple building
itemId:
- Items table: /games/manorlords/items/items-table
How to use:
- Select the buildings you want to add resource into
- Enter the command
Example usage:
k.addResourceToSelectedBuildings 17 100
add 100 Planks (itemID_17)
k.addResourceToSelectedBuildings 216 -10
remove 10 Firewood (itemID_216)
Add Item by
itemId by
amount to selected buildings
invokes k.addResourceToSelectedBuildings $itemId $amount
Demolish player selected buildings, optionally
refund the construction cost
Selected buildings is the building you select (building panel open), pin multiple panel to select multiple building
How to use:
- Select the buildings you want to demolish
- Enter the command
Example usage:
k.demolishSelectedBuildings true
Demolish player selected buildings, and refund the construction cost
invokes k.demolishSelectedBuildings true
Toggle insta build mode
Does not work on Burgage Plotter
Does work on Castle Planner
How to use:
- Enter the command
- If enabled, place a Building Construction or commit the Castle Planner blueprint. It will be constructed instantly without consuming any resources.
Skip the Mourning Period on any buildings in current region
Current region refer to the Region under player view
How to use:
- Move view to the target Region
- Enter the command
- You might need to re-open UI to see visual change
Spawn remaining construction resources to player selected buildings
Selected buildings is the building you select (building panel open), pin multiple panel to select multiple building
How to use:
- Select the buildings you want to spawn construction resources into
- Enter the command
Spawn remaining construction resources to buildings in current region
Current region refer to the Region under player view
How to use:
- Move view to the target Region
- Enter the command
- You might need to re-open UI to see visual change
Region - deposit
Add
amount to deposit by
depositId at location under player cursor
Stone deposit is unlimited hence not included.
To spawn stone above the deposit see k.spawnResourceAtCursor
depositId:
- iron
- clay
- salt
How to use:
- Pick the deposit you want to add amount into
- Hover your mouse cursor over it
- Enter the command
Example usage:
k.addDepositAtCursor iron 500
k.addDepositAtCursor iron -500
Mark deposit by
depositId at location under player cursor as Normal type deposit
When Stone deposit is marked normal, the underground deposit is made unavailable
depositId:
- iron
- clay
- salt
- stone
How to use:
- Pick the deposit you want to mark as normal
- Hover your mouse cursor over it
- Enter the command
Example usage:
k.markNormalDepositAtCursor iron
Mark deposit by
depositId at location under player cursor as Rich type deposit
When Stone deposit is marked rich, the underground deposit is made available
depositId:
- iron
- clay
- salt
- stone
How to use:
- Pick the deposit you want to mark as rich
- Hover your mouse cursor over it
- Enter the command
Example usage:
k.markRichDepositAtCursor iron
Remove deposit by
depositId at location under player cursor
If a stone chunk still exist above the Stone deposit then it will be marked as non-rich instead
depositId:
- iron
- clay
- salt
- stone
How to use:
- Pick the deposit you want to remove
- Hover your mouse cursor over it
- Enter the command
Example usage:
k.removeDepositAtCursor iron
Spawn deposit by
depositId at location under player cursor
Stone deposit is always Rich
depositId:
- iron
- clay
- salt
- stone
How to use:
- Pick the location you want to spawn deposit at
- Hover your mouse cursor over it
- Enter the command
Example usage:
k.spawnDepositAtCursor iron 500
k.spawnDepositAtCursor stone 1
Region - farming
Set the crop fertility limit to value at currently previewed work area
cropType:
- emmer
- flax
- barley
value must be decimal within 0.0 .. 1.0
alsoRestoreFertility whether to also restore fertility to the new limit
How to use:
- Select a building
- Click the building Limit Work Area button
- Move and Resize the Work Area preview to desired area
- Enter the command
Example usage: k.setFertilityAtWorkArea emmer 1.0 true
invokes k.setFertilityAtWorkArea <cropType <value> true
Set the crop fertility limit to value at plant plots in currently selected buildings
cropType:
- emmer
- flax
- barley
value must be decimal within 0.0 .. 1.0
alsoRestoreFertility whether to also restore fertility to the new limit
How to use:
- Select a building that has plant plots (e.g. Farming fields)
- Enter the command
Example usage: k.setFertilityAtBuildingPlantPlots emmer 1.0 true
invokes k.setFertilityAtBuildingPlantPlots <cropType> <value> true
cropType:
- emmer
- flax
- barley
How to use:
- Select a building
- Click the building Limit Work Area button
- Move and Resize the Work Area preview to desired area
- Enter the command
Example usage: k.restoreFertilityAtWorkArea emmer
cropType:
- emmer
- flax
- barley
value must be decimal within 0.0 .. 1.0
alsoRestoreFertility whether to also restore fertility to the new limit
How to use:
- Select a building that has plant plots (e.g. Farming fields)
- Enter the command
Example usage: k.restoreFertilityAtBuildingPlantPlots emmer 1.0 true
Set the crop fertility limit to value at plant plots in currently selected buildings
invokes k.restoreFertilityAtBuildingPlantPlots <cropType> true
cropType:
- emmer
- flax
- barley
How to use:
- Select a building
- Click the building Limit Work Area button
- Move and Resize the Work Area preview to desired area
- Enter the command
Example usage: k.restoreFertilityAtWorkArea emmer
cropType:
- emmer
- flax
- barley
How to use:
- Select a building that has plant plots (e.g. Farming fields)
- Enter the command
Example usage: k.restoreFertilityAtBuildingPlantPlots emmer
Region - forestry
Planted trees usually have 3 stages until they can be harvested, each stage need at least 1 day to pass.
How to use:
- Move view to the target Region
- Enter the command
Planted trees usually have 3 stages until they can be harvested, each stage need at least 1 day to pass.
How to use:
- Move view to the target Region
- Select a building
- Click the building Limit Work Area button
- Move and Resize the Work Area preview to desired area
- Enter the command
Region - landscape
Villagers may refuse to build the pond.
We suggest using the k.instaBuild mode.
If already constructed but not finished you can save-and-load the game.
To spawn the Shoal of Fish see k.spawnShoalOfFishToFishingPondAtCursor
How to use:
- Enter the command
- Place the pond at any suitable location
- Your village builders will build the pond (do read Warning above)
Remove Fishing Pond at location under player cursor.
Shoal Of Fish inside it will also be removed.
How to use:
- Pick the Fishing Pond to remove.
- Hover your mouse cursor over it.
- Enter the command.
Region - livestock
Skip the livestock trading interval in current region
Livestock trading interval refer to the 30-day cooldown between ordering new Livestock in a Region
Current region refer to the Region under player view
How to use:
- Move view to the target Region
- Enter the command
- You might need to re-open UI to see visual change
Spawn
amount animal by given
animalId to location under player cursor
sheep and lamb might not be immediately accommodated due to unavailable space, make sure you have an active Trading Rule in the Region so the game will accommodate them later.
animalId:
- sheep
- lamb
- ox
- oxen
- horse
- mule
amount must be within 1..512
How to use:
- Pick a location and hover your mouse cursor over it
- Enter the command
Example usage:
k.spawnAnimalAtCursor sheep 10Spawn 10 sheep
k.spawnAnimalAtCursor ox 2Spawn 2 oxen
Spawn 1 animal identified by given
animalId to location under player cursor
invokes k.spawnAnimalAtCursor $animalId 1
Region - pops
Toggle boop mode
Boop mode is used to manually reset the task of a unit, if they are stuck doing a certain task this might help them to move somewhere else.
How to use:
- Enter the command
- Click on any unit you want to boop
Request grow population to current region, amount of times
Grow population may be rejected by multiple factors, notably Available Living Space and the Region Approval at the end of last month.
Tip: you can trick region approval using k.setRegionalApproval
How to use:
- Move view to the target region
- Enter the command
Region - resource
Empty all resource by given
resId in current region
Stone cannot replenish hence not included To remove stone see k.removeResourceAtCursor esId
Current region refer to the Region under player view
resId:
- berries
- fish
- mushroom
- eel
How to use:
- Move view to the target Region
- Enter the command
Example usage:
k.emptyRegionResource berries
Mark resource clump by
resId at location under player cursor as Normal type resource
When Stone is not rich, their underground deposit is made unavailable
resId:
- berries
- mushroom
- stone
How to use:
- Pick the resource clump
- Hover your mouse cursor over it
- Enter the command
Example usage:
k.markNormalResourceClumpAtCursor berries
Mark resource clump by
depositId at location under player cursor as Rich type resource
When Stone is rich, their underground deposit is made available
resId:
- berries
- mushroom
- stone
How to use:
- Pick the resource clump
- Hover your mouse cursor over it
- Enter the command
Example usage:
k.markRichResourceClumpAtCursor berries
Refill all resource by given
resId in current region
Stone cannot replenish hence not included
To spawn stone see k.spawnResourceAtCursor <resId>
Current region refer to the Region under player view
resId:
- berries
- fish
- mushroom
- eel
How to use:
- Move view to the target Region
- Enter the command
Example usage:
k.refillRegionResource berries
Remove resource by given
resId at location under player cursor
When Stone is rich, their underground deposit will stay
resId:
- berries
- mushroom
- stone
How to use:
- Pick the resource
- Hover your mouse cursor over it
- Enter the command
Example usage:
k.removeResourceAtCursor berries
Remove resource clump by given
resId at location under player cursor
When Stone is rich, their underground deposit will stay
resId:
- berries
- mushroom
- stone
How to use:
- Pick the resource clump
- Hover your mouse cursor over it
- Enter the command
Example usage:
k.removeResourceClumpAtCursor berries
Spawn resource by given
resId at location under player cursor
The resource capacity depends on whether the resource node is Rich
If there is an existing resource node with the same resId within 23 meter then the spawned resource will join the resource clump within that node. Else a new resource node will be spawned at that location
resId:
- berries
- mushroom
- stone
How to use:
- Pick the location to spawn the resource at
- Hover your mouse cursor over it
- Enter the command
Example usage:
k.spawnResourceAtCursor berries
Spawn Shoal Of Fish to Fishing Pond at location under player cursor.
isRich: Whether the Shoal Of Fish should be Rich
How to use:
- Pick the Fishing Pond to spawn at.
- Hover your mouse cursor over it.
- Enter the command
Example usage:
k.spawnShoalOfFishToFishingPondAtCursor true
Region - stat
Add Regional Wealth by
amount to current region
Put negative amount to decrease
Current region refer to the Region under player view
How to use:
- Move view to the target Region
- Enter the command
Example usage:
k.addRegionalWealth 999
k.addRegionalWealth -999
Set Regional Wealth to
amount to current region
Current region refer to the Region under player view
How to use:
- Move view to the target Region
- Enter the command
Example usage:
k.setRegionalWealth 999
k.setRegionalWealth -999
Set Approval to amount to current region
Useful to be used with k.growRegionPopulation
Note that region approval will be invalidated from residents memory on the next day.
amount must be within 0..100
How to use:
- Move view to the target Region
- Enter the command
Region - threat
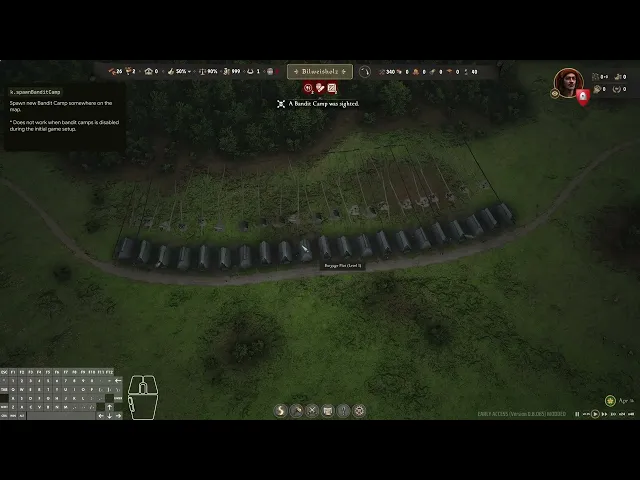
Spawn new Bandit Camp somewhere on the map
How to use:
- Enter the command
Spawn new Bandit Camp at location under player cursor
How to use:
- Pick a location to spawn the bandit camp at
- Hover your mouse cursor over it
- Enter the command
Spawn
amount group of raider that will rally at location under player cursor
The raider will spawn at nearest border from the rally position
amount must be within 1..512
How to use:
- Pick a location for the rally position
- Hover your mouse cursor over it
- Enter the command
Example usage:
k.spawnRaiderRallyAtCursor 1
Spawn 1 group of raider that will rally at location under Player cursor
Invokes k.spawnRaiderRallyAtCursor 1
Misc Commands
Print Misc (others) console commands to the console window
How to use:
- Enter the command
- The commands will be printed to the Console Window, make sure the console is extended to see them
Enter commands listed in the File at given
path
Commands is new-line separated
path must ends with ".txt"
path may be absolute or relative
path containing space can be wrapped with double quotes ( " )
How to use:
- Enter the command
Example usage:
relative path:
k.enterCommandsFromFile ue4ss/Mods/MLConsoleCommandsMod/myCommands.txt
absoulute path:
k.enterCommandsFromFile "D:/Spaced Dir/SteamLibrary/steamapps/common/Manor Lords/ManorLords/Binaries/Win64/ue4ss/Mods/MLConsoleCommandsMod/myCommands.txt"
Misc - control
Set the Game Speed to
amount
amount must be an integer
amount cannot be negative
If you need more granular speed such as 0.5 see slomo
How to use:
- Enter the command
Example usage:
k.setGameSpeed 24
Misc - date/calendar
Skip
amount day(s)
Forward the date / calendar, is not a fast-forward, useful for quickly testing stuff that happen every certain day.
How to use:
- Enter the command
Example usage:
k.skipDay 30
Skip 1 day
Invokes k.skipDay 1
Misc - trade
Print the current state of Foreign Supply to the console window
Foreign Supply Influence the market price
Default amount is 500, more supply means lower price, less supply means higher price
How to use:
- Enter the command
- The commands will be printed to the Console Window, make sure the console is extended to see them
Misc - unit
Rename the Unit current pointed by player cursor to
name
Work on animals
name containing space can be wrapped with double quotes ( " )
How to use:
- Pick the unit to rename
- Point your cursor to it
- Enter the command
Example usage:
k.renameUnitAtCursor "cuntz"
k.renameUnitAtCursor "cuntz the farmer"
Misc - view
Follow the Unit currently pointed by Player cursor
Work on animals
How to use:
- Pick the unit to follow
- Point your cursor to it
- Enter the command
Misc - weather
Begin drought
Drought progression will be set to at least 10%
How to use:
- Enter the command
Begin drought instantly
Drought progression will be set to 100%
How to use:
- Enter the command
Begin rain,
isDamaging
Rain progression will be set to at least 10%
isDamaging: Whether the rain is damaging, else soak
How to use:
- Enter the command
Example usage:
k.makeRain true
Begin rain, not damaging
Invokes k.makeRain false
Begin rain instantly,
isDamaging
Rain progression will be set to 100%
isDamaging: Whether the rain is damaging, else soak
How to use:
- Enter the command
Example usage:
k.makeRainInstantly true
Begin rain, instantly, not damaging
Invokes k.makeRainInstantly false
Skip Drought
Drought will start progressing back to 0%
How to use:
- Enter the command
Skip Drought Instantly
Drought progression will be set to 0%
How to use:
- Enter the command
Skip Rain
Rain will start progressing back to 0%
How to use:
- Enter the command
Skip Rain Instantly
Rain progression will be set to 0%
How to use:
- Enter the command
Built-in commands
You can use these commands if you have the console window open, even without this mod.
Engine
Toggle the Engine FPS counter
How to use:
- Enter the command
Toggle the Engine metrics counter
How to use:
- Enter the command
Enter the debug camera mode (free look)
[!CAUTION] You can not toggle out
How to use:
- Enter the command
Speed up/down time passed in game by
amount times
Includes panning speed and first-person walk speed
amount may be a fraction
How to use:
- Enter the command
Example usage:
slomo 0.5
slomo 48
Takes screenshot ignoring HUD
Broken in UE 5.5
Set the maximum FPS to
amount
How to use:
- Enter the command
Example usage:
t.maxFps 99
Manor Lords
Add some amount of items by
itemId to your settlement
itemId:
- Items table: /games/manorlords/items/items-table
If not sure use DT_Translation_Items.uasset
How to use:
- Enter the command
Example usage:
k.addGood 17
add some Planks
Add plenty of essential item to your settlement
How to use:
- Enter the command